I hate when people act like Yumkugu is some secret chef-only ritual.
It’s not.
You don’t need a wok master certificate or a pantry full of mystery spices to Cook Yumkugu at Home.
Most folks love it at restaurants but assume the recipe is locked away behind a velvet rope. Wrong.
It’s just food. Made with real ingredients. Cooked step by step.
Yeah, I tried it three times before it tasted right. The first batch was too salty. The second?
Undercooked. But the third (that) one made my roommate ask for seconds and the recipe.
You’ll get that same win.
No fancy gear. No “chef-level” skills. Just clear directions and honest timing.
Some guides overcomplicate it. They bury you in technique talk or list ten optional garnishes. Not this one.
We’re making Yumkugu. Not a thesis.
You’ll learn how to prep the base, control the heat, and know exactly when it’s done. Not guess.
That moment when you stir it and smell it. That rich, earthy, warm scent (it) hits different when you made it yourself.
You’ll feel it.
And you’ll want to make it again.
This guide gives you the real steps. Nothing extra. Nothing missing.
You’ll cook it. You’ll eat it. You’ll be glad you did.
What Yumkugu Actually Is
Yumkugu is a thick, savory stew with dumplings (no) fancy words needed.
It’s the kind of dish you eat when your feet are cold and your brain is tired.
I first tried it in a cramped kitchen in eastern Georgia (not the US state).
That’s where Yumkugu comes from (not) some food lab.
It’s got tender lamb, garlic-heavy broth, and soft wheat dumplings that soak up everything. No cream. No cheese.
Just meat, dough, and time.
People love it because it fills you up and stays in your head.
You don’t forget the first bite.
Why does it work? Because it’s built on repetition. Not trends.
Grandmothers make it the same way their mothers did.
You can Cook Yumkugu at Home with just a pot and patience. No special tools. No “authentic” spice blend you can’t find.
It’s not fancy.
It’s honest.
(And yes. It reheats well.)
What’s in Your Yumkugu Bowl
I grab chicken thighs first. Not breasts. Thighs stay juicy when simmered long.
You’ll need 1 lb, boneless and skinless.
For the sauce: ½ cup soy sauce, ¼ cup rice vinegar, 3 tbsp brown sugar, 2 tbsp sesame oil, and 1 cup vegetable broth.
(Yes, chicken broth works fine if that’s what you’ve got.)
Dumplings need 1¾ cups all-purpose flour, ½ tsp salt, and ⅔ cup cold water. Mix until it just holds. No kneading.
No fuss.
Spices are simple: 4 garlic cloves (minced), 1-inch ginger (grated), 2 green onions (chopped), and 1 tsp black pepper. Fresh is better. Dried garlic or ginger?
Use half the amount (they) hit harder.
You can swap chicken for ground pork or firm tofu.
Beef gets tough unless you slice it thin and marinate it 20 minutes first.
Rice vinegar gives tang. Apple cider vinegar swaps in okay (but) skip white vinegar. It’s harsh.
You don’t need a fancy wok to Cook Yumkugu at Home. A big skillet works. So does a Dutch oven.
Flour type matters less than you think. Whole wheat? Fine.
Just add a splash more water. Gluten-free flour blends? They can work (but) the dumplings get fragile.
I’d stick with all-purpose unless you’re committed to testing.
Soy sauce brands vary. If yours is super salty, cut the added salt in half.
Broth should be low-sodium. You control the salt here. Not the box.
You’ll spend more time chopping than cooking. That’s the real tradeoff. Fast prep or fast cook?
Pick one.
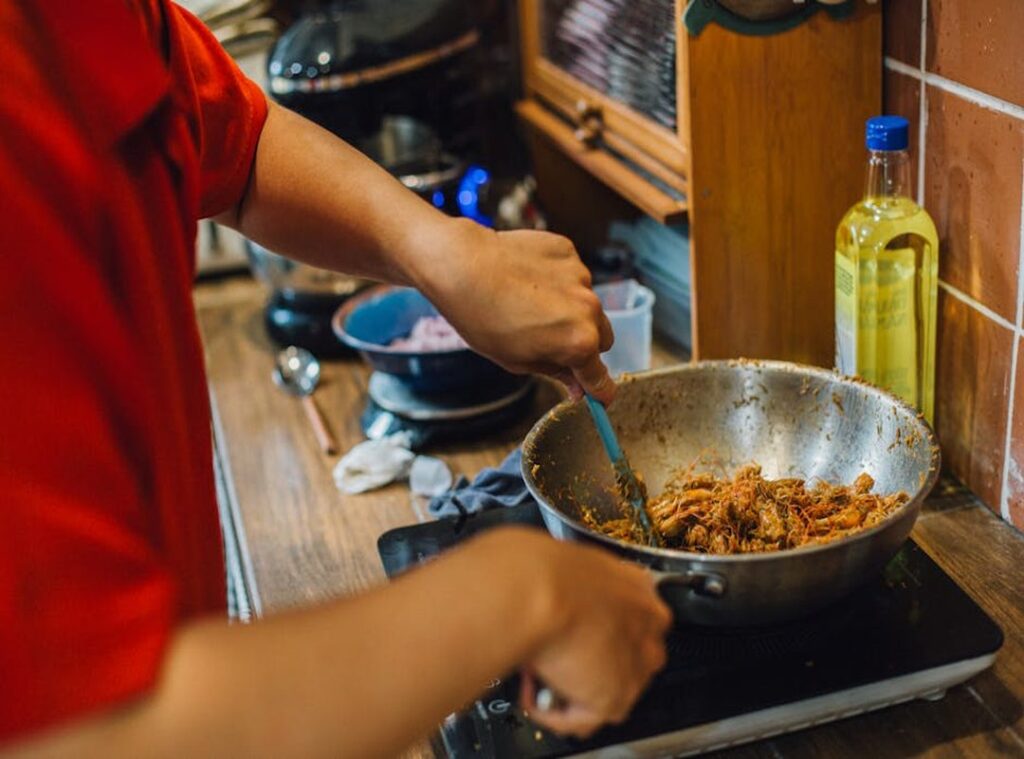
How to Actually Cook Yumkugu at Home
Step 1: Brown the chicken hard. Not light brown. Dark brown.
Get that crust. Flip once. Don’t crowd the pan or it steams instead of sears.
(Yes, you’ll need two batches.)
Step 2: Sweat onions, garlic, and ginger in the same pan. Add a splash of water if the fond starts blackening. Then pour in coconut milk and fish sauce.
Stir. Let it bubble for two minutes. No more.
Step 3: Mix dumpling dough with cassava flour and warm water. It should hold together but not stick to your fingers. Roll into walnut-sized balls.
Don’t overmix. They’ll get gummy. (I learned this the hard way.)
Step 4: Drop dumplings into simmering sauce. Gently push them under. Cover and simmer 12 minutes.
No peeking early. You’ll know they’re done when they float and feel springy. Not mushy.
When poked.
You think you can skip browning? You can’t. That crust = depth.
Skip it and your Yumkugu tastes flat.
Sauce burns easy. Keep heat at medium-low after adding coconut milk. Stir every 90 seconds.
If it sticks, add a spoonful of water. Not broth, not stock. Just water.
Dumplings too dense? Too much flour. Too soft?
Not enough resting time. Let them sit 10 minutes before cooking. They tighten up.
Can I Make Yumkugu without a mortar and pestle? Yes. But don’t use a blender for the aromatics.
You’ll get juice, not paste. A knife works fine.
Don’t stir dumplings while simmering. They’ll break. Just tilt the pot gently to rotate liquid.
Salt is tricky here. Fish sauce adds salt. Taste after simmering, not before.
You’ll over-salt otherwise.
This isn’t fancy. It’s patient. It’s hands-on.
You cook Yumkugu at home by paying attention. Not following magic ratios.
Burnt sauce? Start over. There’s no saving it.
Too much liquid? Simmer uncovered 5 more minutes. Too little?
Add hot water. Never cold. Shock stops cooking.
Serve hot. Not lukewarm. Not reheated twice.
Once. Right then.
Yumkugu That Doesn’t Taste Like Regret
I burned my first batch. Left it on the stove while checking my phone. Smoke alarm screamed.
You know that smell. The one that says “you’re not a chef, you’re a fire hazard.”
Use fresh ingredients. Not “fresh-ish.” Not “good enough.” Real ginger. Real scallions.
Real chili. If your garlic’s soft or your broth’s salty out of the box, fix it now.
Want more heat? Add chili. Want brightness?
Squeeze lemon after cooking (not) before. Acid changes everything.
Leftovers go in a glass container. Lid tight. Fridge only.
Three days max. After that, it tastes like sadness and time.
Reheat slow. Stovetop. Low flame.
Stir. Splash in broth if it’s drying out. Never microwave it.
Microwaves make yumkugu sad.
Serve with cilantro. Or parsley. Or nothing (just) eat it straight from the bowl.
Crusty bread works. So does rice. Or cold noodles on a hot day.
You ever wonder why some recipes skip the hard truths? Like how easy it is to overcook the shrimp? Or how much salt hides in store-bought broth?
Cook Yumkugu at Home means tasting it before you serve it. Always.
And skip fake flavor boosters. Real food doesn’t need tricks. Check Yumkugu Food Additives if you’re curious what’s hiding in your pantry.
Your Yumkugu Is Ready
You thought it was too hard.
I did too (until) I tried it the right way.
Now you know how to Cook Yumkugu at Home. No guesswork. No stress.
Just real food, made by you.
That doubt? It’s gone. The craving?
Still there.
So go ahead. Heat the pan. Chop the greens.
Taste something real.
Did it work? Did it surprise you? Post a photo.
Try ginger instead of garlic. Add shrimp. Burn the first batch.
(I did.)
None of that matters if you don’t make it.
Your kitchen is ready.
Your bowl is waiting.
Grab the ingredients.
Start tonight.
 Rooted in the philosophy of mindful living and intentional environments, Orynthara Dwell explores the deep connection between our surroundings and our well-being. The brand focuses on the mastery of home styling, blending aesthetic grace with functional purpose to transform living spaces into personal sanctuaries. By emphasizing clean lines and a harmonious balance of form and light, Dwell provides the blueprint for creating interiors that reflect a refined, modern lifestyle.